Build a personal website using Hugo and Netlify
- EN
- ZH
TL;DR
- This article is a guide on how to build a personal site using Hugo and Netlify. It’s for readers who want to create their own websites from scratch but don’t understand how websites work.
What is Hugo and Netlify?
-
Hugo: A tool to build static websites. It converts contents, such as articles and images, into a complete website.
-
Netlify: It allows you to easily deploy your websites to the internet.
Why I choose Hugo and Netlify?
-
Affordability: Hugo and Netlify(the base plan) are free for users. To build a website, I only need to spend money on buying a domain. Compared to other website-building platforms such wordpress and squarespace, this way is much cheaper.
-
Themes: Hugo provides a variety of themes. If you can find a suitable theme, it’s not difficult to build a website.
-
Customization: With Hugo, you have the flexibility to customize aspects such as adjust layout, content display and almost every aspect of your site. It’s more flexible than other website-building platforms.
-
Popularity: Hugo and Netlify are both popular tools for generating static websites. This is beneficial for beginners, because there’re a lot of tutorials and discussions to help you building a site.
Steps
-
Install Hugo
-
Follow the installation tutorial
-
To verify the installation, open the terminal and enter “hugo version”. If Hugo is successfully installed, you will see the version number displayed.

-
-
Download Hugo Theme
-
Check your requirements: Like me, I chose the theme because of its clear layout, multilingual mode, dark mode and google analytics support.
-
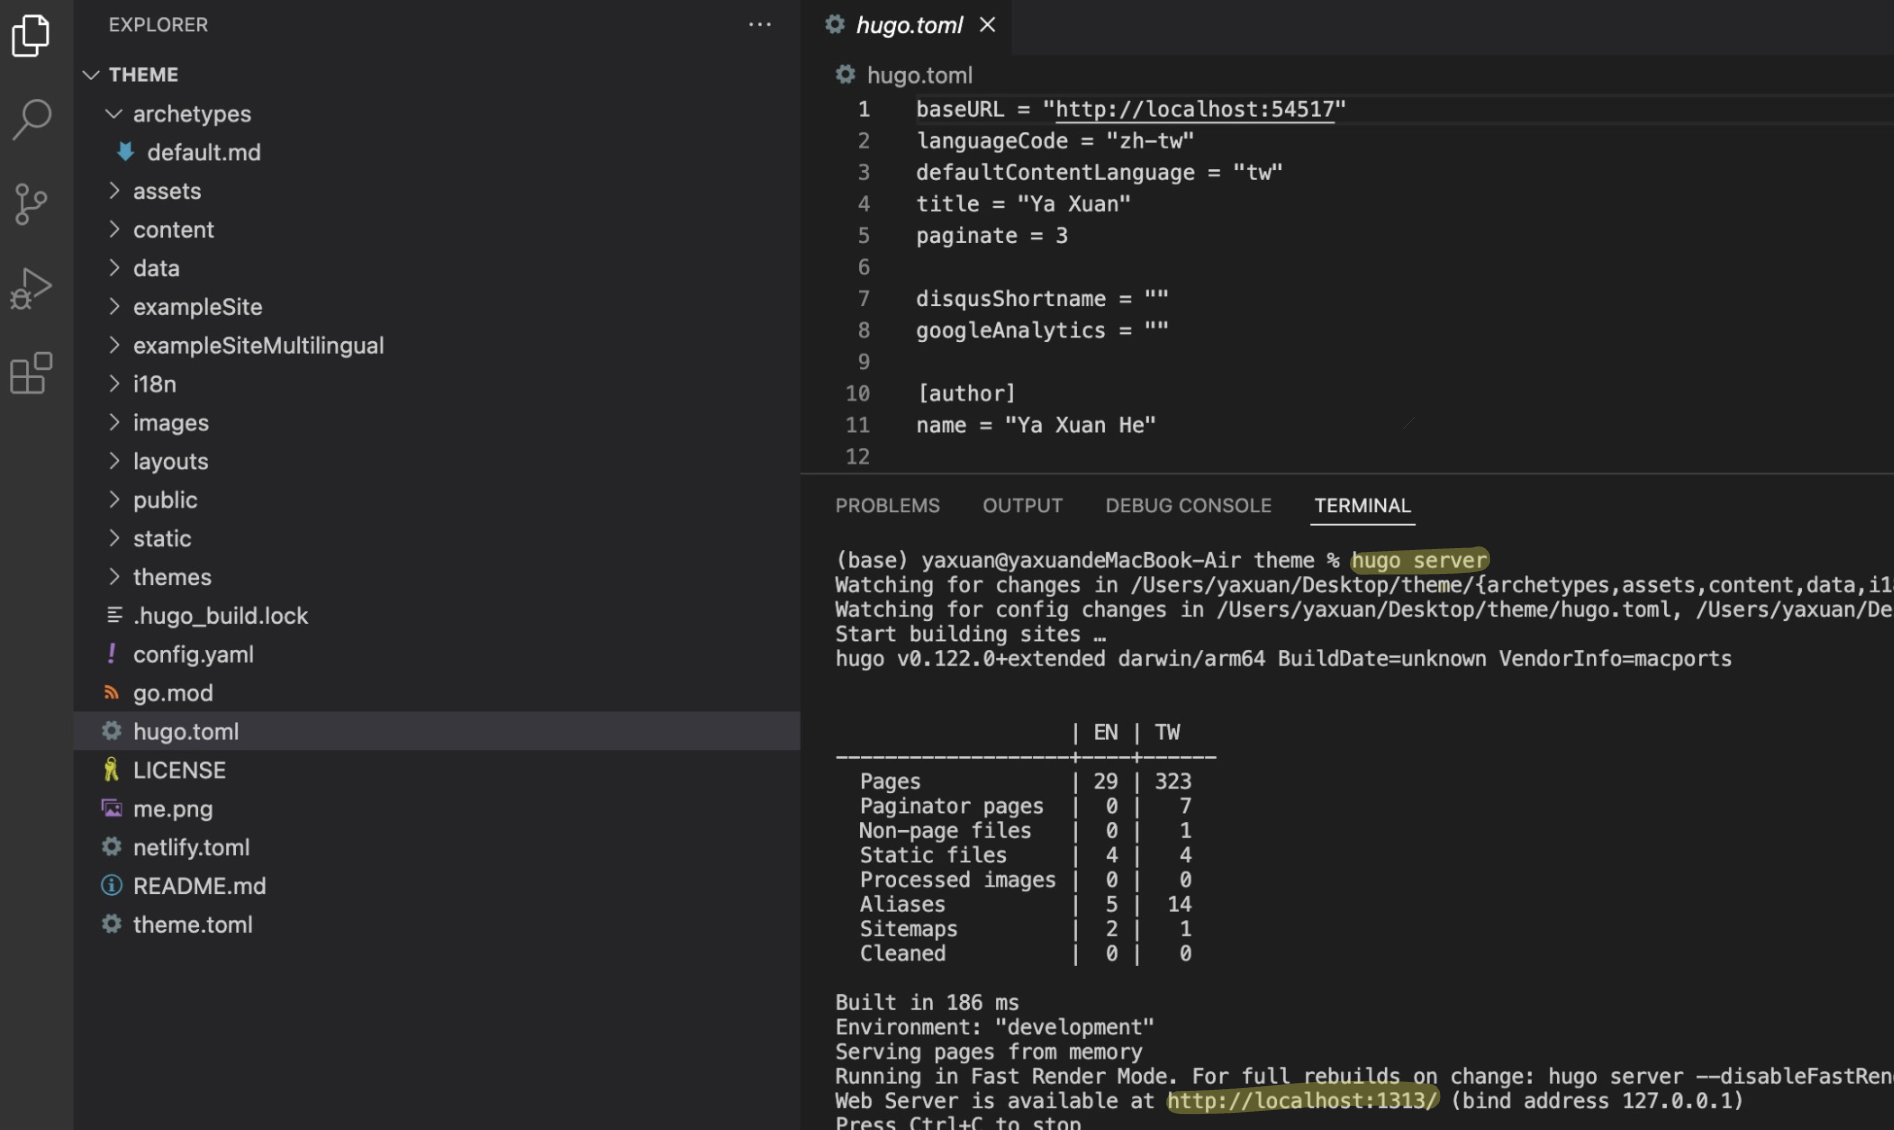
Test on the local environment: After duplicating the template, open the template folder in VS Code. Then, enter “hugo server“ in the terminal to preview your website by navigating http://localhost:XXXX/.
-
-
Adjust Hugo Theme
-
The difficulty depends on the extent you want to adjust. This is the most time-consuming part through building a website. I recommend to browse the template folders and files first. You can also follow the tutorials on the Hugo official website, their videos are short and easy to understand.
-
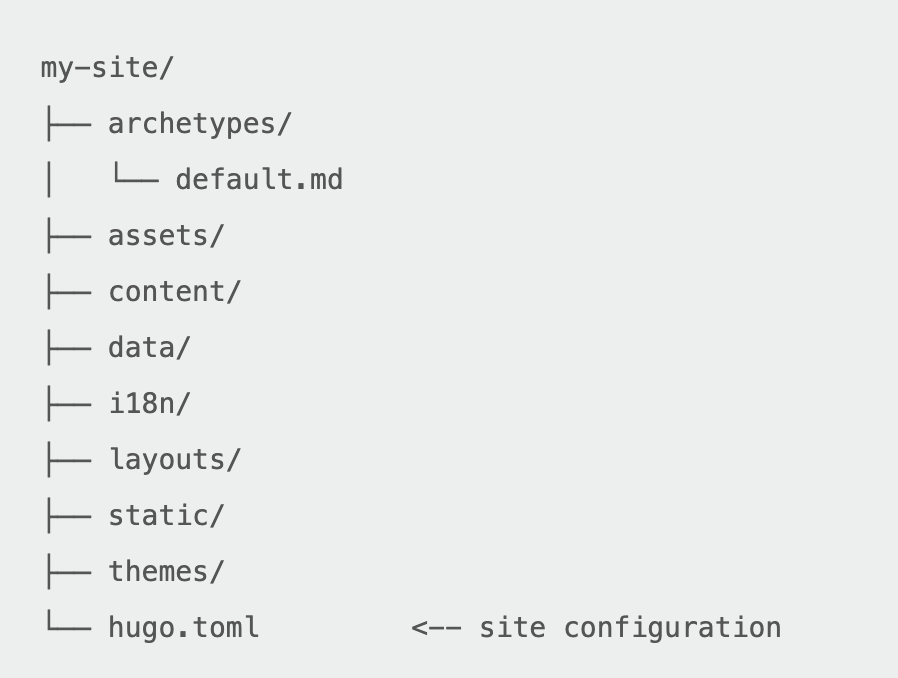
Hugo Structure:
-
Every Theme has the similar structure. You can browse Hugo Directory structure to check.
-
The use of common folders and files
-
hugo.toml: contains website title, description and language
-
assets: contains global resources such as CSS(website style), JavaScript(website interaction)
-
content: contains the content such as articles of your site
-
i18n: contains translation tables for multilingual sites
-
layouts: contains templates to transform content, data, and resources into a complete website
-
-
-
Adjust layouts and upload contents: The following are the main parts I adjusted
-
Set title, language, menu and google analytics id in hugo.toml
-
Set font and color in assets/css file
-
Transformed my articles into markdown files and uploaded them to contents folder
-
Set translation tables in 18n folder
-
-
-
Upload to GitHub
- Upload website folder to the repositories in GitHub
-
Deploy with Netlify
- Connect GitHub to Netlify: Sign in Netlify → Add a new site → deploy with GitHub. After finishing the steps, you can deploy your website using Netlify.
-
Custom Domain
-
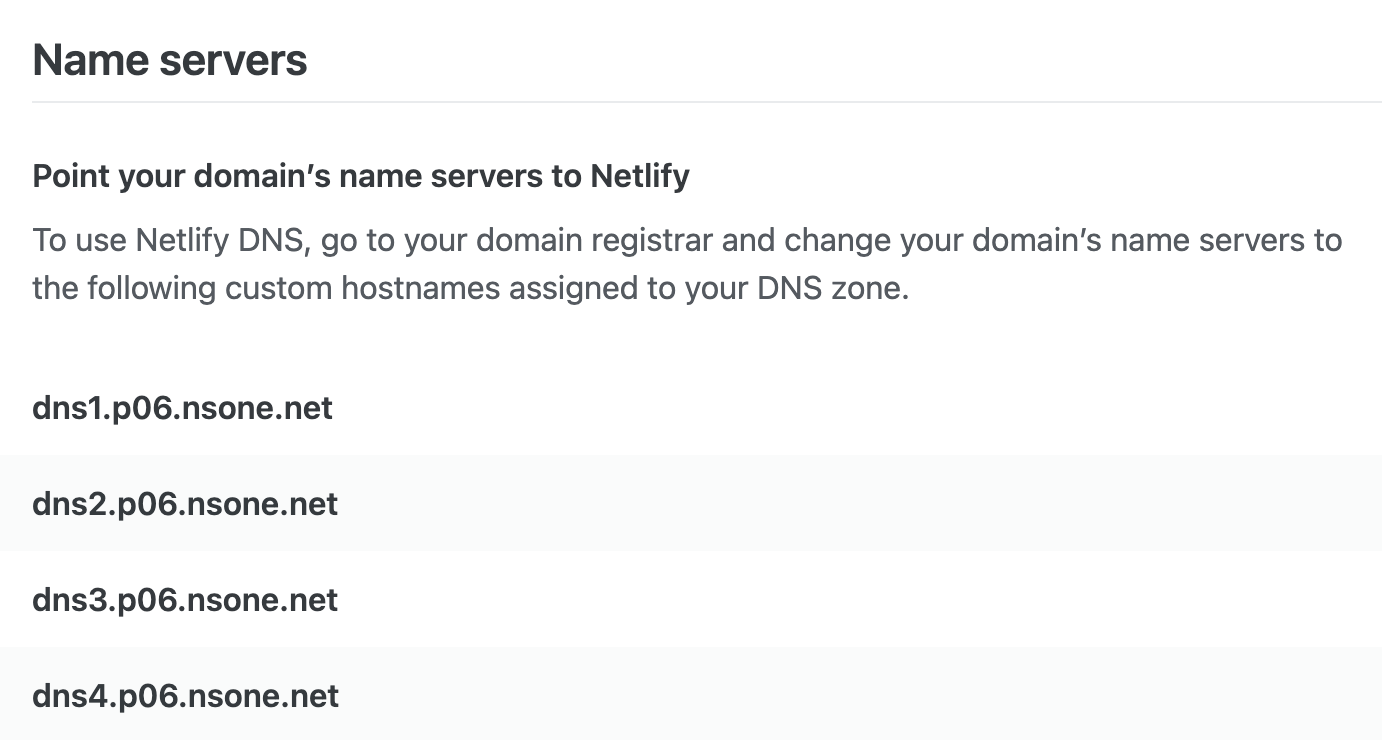
Netlify: Follow the path Netlify > Domain Management > Add a custom domain. After setting your custom domain, you can see the Name servers in DNS setting.
-
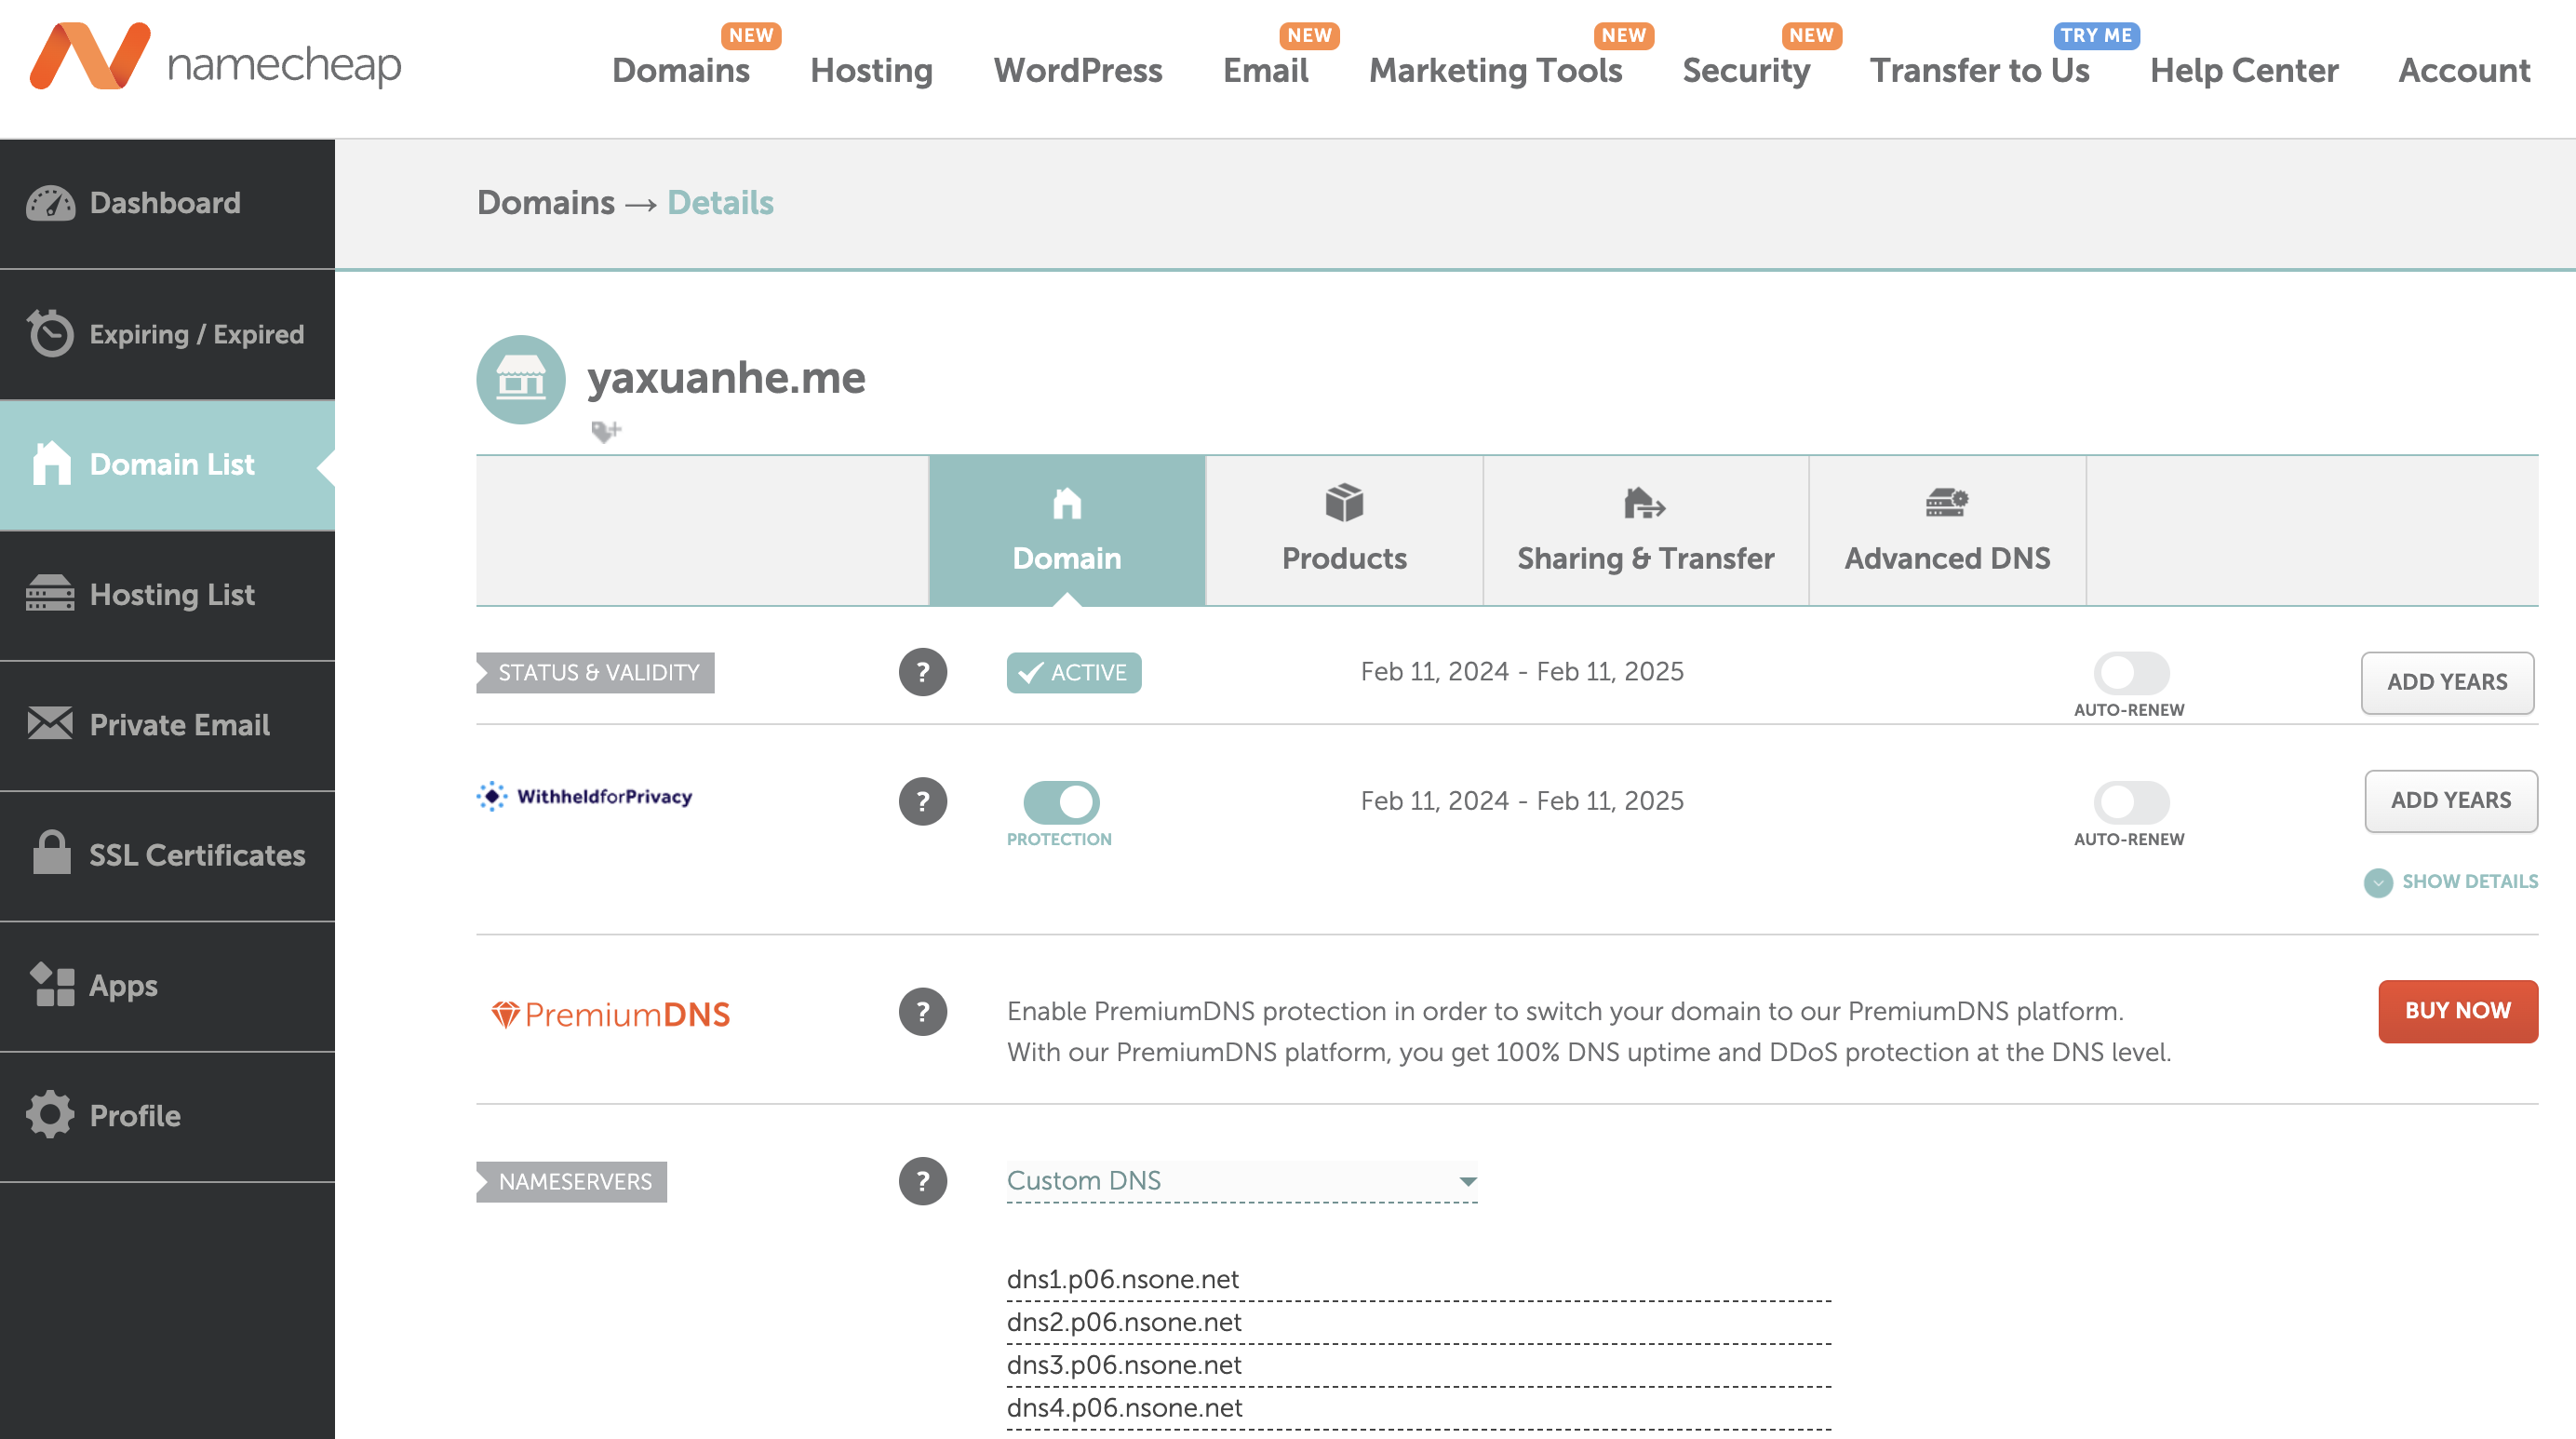
Domain registrar: Add Netlify DNS in your domain registrar. For example, with Namecheap, you can add custom DNS by navigating to Domain Lists > Domain > Nameservers > custom domain
-